Showing posts with label DIY. Show all posts

First Birthday Party Recap - Onederful You

It's already been a few weeks since C's first birthday party and I am still feeling grateful for all of the support and love that surrounded us. When I was first thinking about a party theme for him, my mind kept drawing blank. I feel like a theme for the first birthday party can be tough because it's hard to really know what your little one is really into. And let's face it, most first birthday parties are for the parents and the family to celebrate.

Since C has gone through so much in his first year with his cleft journey I really wanted something that was simple and focused on celebrating him. Sure there are a lot of cute ideas out there, but when I was getting inspiration a lot of it didn't feel right.

You all know I love a good Pinterest inspired party, and putting parties together is kind of my thing, or at least something that I enjoy. We still had an amazing little celebration for him but I decided to take a less is more approach and focus on things that we already have and making the focus be about how (w)onederful he is.

Most of you know that we have a little tree farm (if you can consider it that) and these trees have been an integral part for our family. I thought it would be cute to take some of the tree clippings and make a little banner out of it to give the decor an extra touch. I picked up this one balloon that was perfect to hang above it.

I mentioned a few weeks ago that we went to a local flea market where I scored a few finds. This little wooden crate I picked up that we used for his first birthday shoot, and this old paint ladder I got that was perfect to highlight his monthly pictures. I've also turned it into our advent calendar for the season, so stay tuned for that.

This little table was a piece that we've had for awhile that we originally had our tv on in our bedroom. Over the years my style and taste has changed and I really wasn't feeling it for my bedroom. I didn't want to get rid of it because I knew it would come in handy again. We used it for C's baby dedication back in July and it happened to be the hottest day, ever. No really, it broke a bunch of records and was beyond hot. Anyway, this little table had some wear and tear to it and almost melted that day. You can probably see some glue dripping on it in those pictures. I decided to give it a little tlc with sanding some areas down, giving it a fresh coat of paint, and using drawer pulls from a previous house that we renovated that was part of the original kitchen. It became the perfect little piece to display his cake on. If it was long enough, I would consider keeping it as a buffet in my dining room.

simple first birthday decor
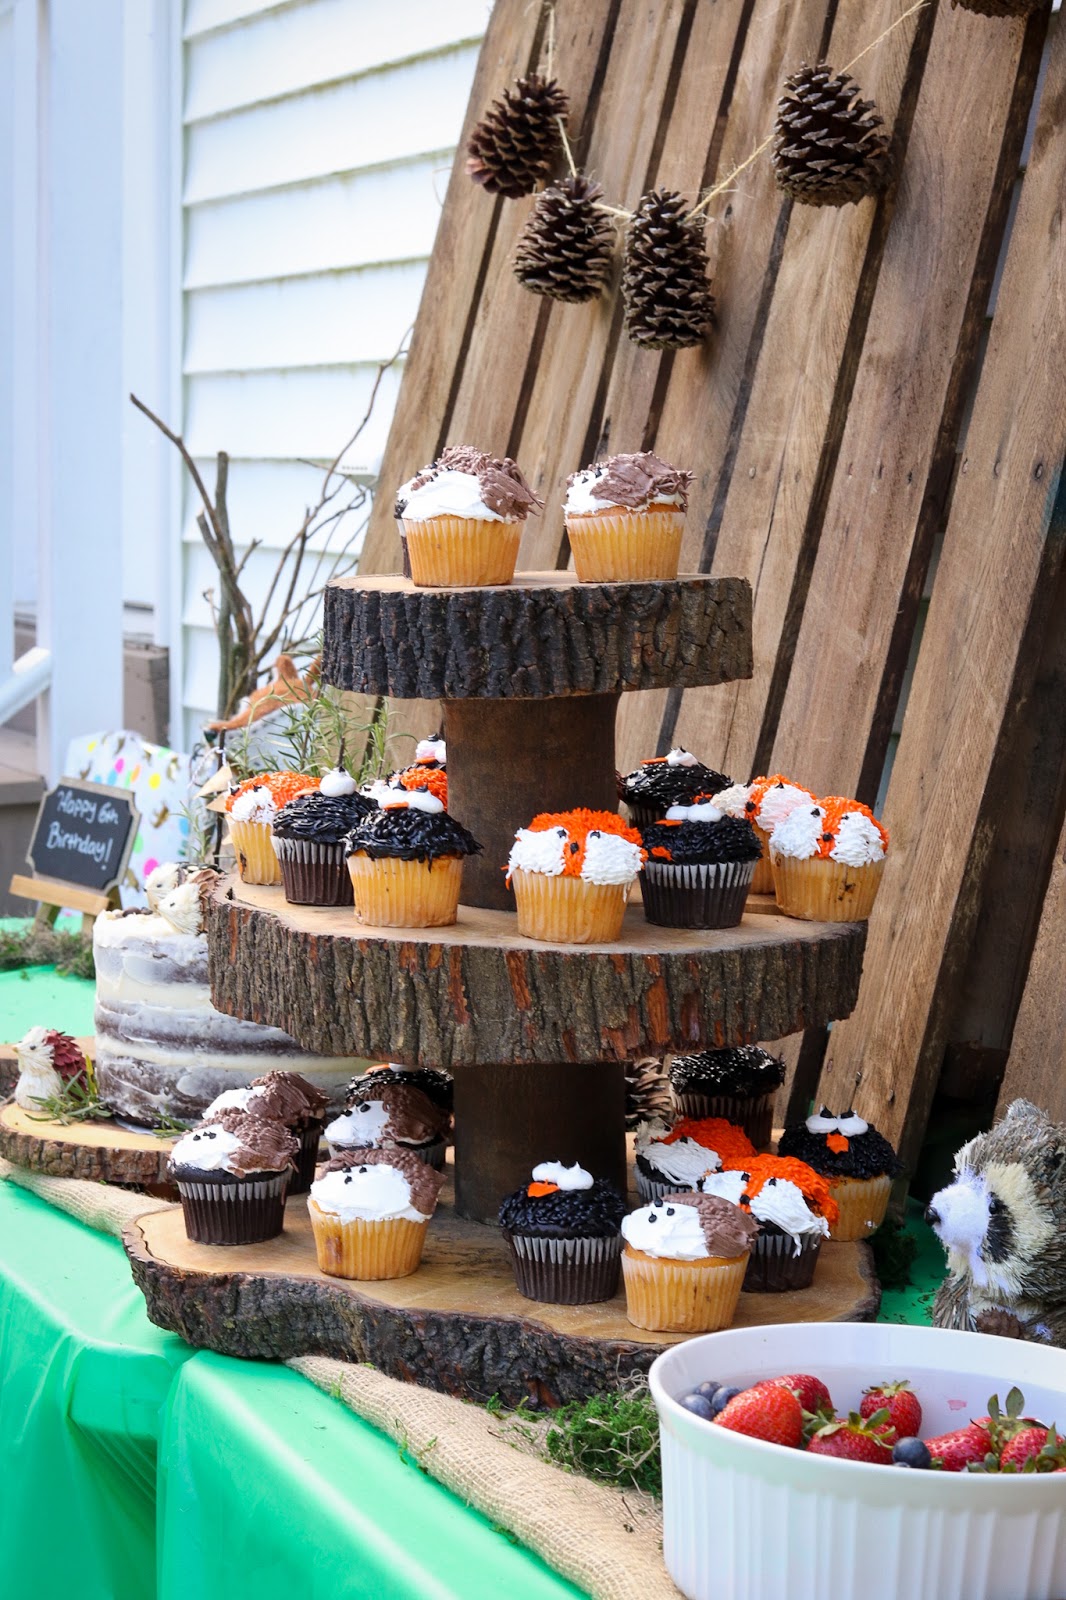
Who doesn't love a good sweet treat at a party? I always thought donut boards were so cute but I didn't want to spend a lot of money on them. What's the next best thing? You make it yourself. And in all honesty, would it even be a party if I didn't give Eric a project to do? The answer is, no. I gave him the direction, dimensions, what I was going for, and the amazing guy that his is executed it for me. My sister hand painted the lettering for us and I love how these came out. We also had to break out the cupcake holder my father in-law made for A's first birthday, because at this point, it's now a tradition to use.

Since C has a November birthday the weather around here is already cold at that point. I love having an outdoor party, and maybe one year we'll get lucky, but more than likely his parties will be indoors. It was funny to see all the changing light in the room throughout the day and it was already dark outside by the time we sang happy birthday to him.

My sister made his cake for him which I was so happy about because she is amazing at making cakes. She says she doesn't enjoy it, but she's so good at it. I was very thankful she was on board with making his. And guess what? He LOVED it. Here's the proof. He cried when we took it away to cut up.

I couldn't resist getting him this little crown and adorable onesie. I think he looked just as handsome as ever. I was so thankful he got in a great nap that day and was so happy after he woke up. It was so cute to see him with all the attention on him celebrating this amazing milestone birthday. Motherhood has a tricky way of allowing us to feel so many emotions at once. I've said it before that it can be such a joy and a struggle to see our little ones grow. I am so incredibly proud of my little guy and so thankful for everyone who celebrated with us both near and far to share in his special day. 

Woodland Themed Birthday Party

It was no surprise to me when my oldest son wanted another outdoor animal inspired party. Some of you might remember last year how we had a reptile party for him with a bunch of real reptile friends that came for a visit. I'm pretty sure he would have this same type of party over and over again each year if he could. It will be interesting to see when he changes his mind or wants something completely different.

He has been an animal lover ever since he was little and would ask us at two years old if we could get a cow. While there are still no cows around here (I think that's one animal we won't be getting), we have expanded our furry, and prickly friends. You might remember how this spring we added our rabbit, Hoppy, and our hedgehog, Flower, to the family. Since the hedgehog is technically his, he wanted to incorporate her into the party, which I thought was a cute idea.

This post contains affiliate links in which I get commission for purchases or clicks made at no additional cost to you. Thank you for your continued support.

We kept the decor pretty simple which felt like it was just enough to give it some added touches. A lot of these ideas I have recycled from his first birthday camping party and his reptile party. If there was anything else that I needed I just went to the backyard which made it really convenient. Some sticks in a mason jar make for an easy and simple center piece. I also made a pinecone garland that we strung along our ever famous pallets.

The stump seats are always a big hit with the kids, and really what I've learned is, regardless of all the things you have setup for them to do, most of the time they just want to run around and have fun with each other. I forgot to take pictures of them but we did have a giant jenga for everyone to play and also a big connect four. Since we have a lot of land to explore the kids wanted to go on a nature walk that Eric and some of the parents went on with the kids.

We also kept the food very basic and kid friendly. There are a lot of really cute food ideas if you take a look on Pinterest, but the birthday boy wanted chick fil a nuggets and pizza, so that's what he got.  We also broke out the pretzel bar again which is quickly becoming another favorite of mine. This time around we had mini pretzels for the kids and they were a hit. My mom did make this fun hedgehog cheese ball with pretzel sticks as the quills that came out really cute.

My sister also made his cake which turned our amazing and I am still obsessing over. She does such a good job with things. Remember how she also made C's baby dedication cake? I think she needs to just make all of my cakes from now on. We also had some cupcakes for the kids to enjoy that we put on the cupcake stand my father in-law made for A's first birthday. I seriously love how much use this has gotten. I feel like it needs to be a tradition now and I also have to use it for C's first birthday, which will be here before I know it. You guys, I'm not sure I can handle him being one just yet.

The kids were all excited to see the hedgehog so we sat them around the stumps and A and I did a little presentation about her and shared some facts with the kids and parents. He's wearing this six shirt that was the perfect birthday shirt for him. I love how he still wears it now since it isn't a typical birthday shirt. We also let the kids come up and get a chance to pet the hedgehog or hold her if they wanted to. I know there are some kids in his class still talking about her and I'm pretty sure a few of them asked their parents if they could get one.

I'm not sure about your little ones but my guys are always so excited to see what the goods are in their party bags. Actually, I'm kind of convinced that it's not even really what's in the party bag, but the fact that they actually get one. Anyway, I found these adorable woodland treat bags that I could not pass up. They were a hit with the kids and they all enjoyed deciding which animal they wanted to pick.

I was so thankful for a day of beautiful weather and a time for him to enjoy celebrating with his friends. Do you throw parties at your house or do you typically have them at another place?

Woodland-decor

DIY Framed Wallpaper Panels

Ok, real talk, this probably seems so silly, but I just sat here for the last 5 minutes staring at my screen trying to figure out what to title this. Framed wallpaper art, DIY make your own framed wallpaper panels, DIY wallpaper (no, that's not really right because I didn't make the wallpaper). Is wallpaper really considered art? What exactly did I DIY? I mean, so much flooding my mind in such a small amount of time. And now I think I need a drink, of water that is...hold on brb. 

Ok, I got my water, even added a slice of lemon to it (we fancy), and now I'm sitting at my desk with full focus (hopefully) to share with you how we created these wallpaper masterpieces. Ah ha! Maybe that's what I should title this? Although, masterpiece status could probably be argued 10 ways to Sunday, so let's move on. 

Are you still with me after all that random rambling? I hope so. Because we're just about to get into the good stuff. These wallpaper thing-u-ma-bobs. If you caught my insta stories over the summer, then you probably saw a sneak peek that we were working on this little project. Most of you have probably heard me mention this before, that my decor approach has been about having less and focusing on some statement pieces throughout the house. If you're visiting, hear me out for a minute. I used to think that my walls needed to be filled with things, or a lot of decor pieces scattered throughout each room, in order for it to feel finished. Maybe it was more so that I thought I needed more to show because that showed I had somewhat of a sense of style. But what I think makes someone's style so unique, is their own approach to it. The things that make them happy, and what they feel when they walk into a room in their own home. Maybe some like having a lot on their walls because that's their sense of cozy. But what I noticed about myself was, walking into rooms like that made me feel overwhelmed. Almost like I'm walking into some sort of museum with so much on display and secretly thinking to myself, oh gosh, that would probably be destroyed at my house with the boys. For now, the season I'm in is working with statement pieces and featured pieces.

What do I mean by featured pieces? It's those focal points in a room that your eyes are directly drawn to. The pieces that kind of make the whole room. That's where this wallpaper art, whatever you want to call it comes into play for me.

Framed-Wallpaper
I love my dining room, but let's face it, it's not a room that gets used all the time. It is however one of the first rooms you see when you walk into my home. I shared about creating a statement entryway, and this is right off to the side when you walk in. You can look one way and see my living room (hoping to share more of that soon) or look the other and there is my dining room. The dining room has some great open wall space that I always knew I didn't want to clutter up. Not for anything, I actually love a clean and fresh blank wall, but I knew that I didn't want every wall in the dining room  to be blank. I took some time and thought through what would make me happy to see in there all the time. Ahhhh, there we go, some framed peonies would make me happy.

My sister recently did a wallpaper accent wall in her bathroom with a similar print and I loved how it came out. We painted the base of our dining room table black so working in a black and white look with the peony wallpaper really ties things together. There are some great options for different peony designs, or you could really use any type of wallpaper that you like. 

I knew that I wanted to keep the wallpaper exposed without getting a standard frame that had glass in front of it. I also knew that finding a frame with the exact measurements that I had in mind for our particular wall would be really difficult (you might be able to already find something off the shelf that works perfect for you). By the time that happened I might as well have made them myself. So that's what I did. Of course with the help of my husband who is always my righthand man.

This post contains affiliate links in which I get commission for purchases or clicks made at no additional cost to you. Thank you for your continued support.

PRODUCTS WE USED:

This section contains affiliate links in which I
Peony wallpaper (based off the the measurement we specifically needed) 
Masonite hardboard panels (also based off of our specific measurements) 
Semi gloss white trim paint 
Measuring tape
Liquid nails 
Caulk 

HOW TO:

First you need to measure your wall space and decide how many panels you want to make and how much wallpaper you need to order. After you decide on a pattern you can start shopping for your other products. I feel like we pretty much live at home depot, so majority of the products I linked are from there or could can be found there. We had the masonite board cut in-store to the exact measurements we needed so it was set and ready to go.

A very important point I want to mention, is that where ever you are working on this project to make sure it is a very clean area. We have a dog, and three little ones, so crumbs and dog hair are kind of unavoidable, but man, they made things a little tricky. I swept and vacuumed twice, but then the dog would walk by and wag his tail, and well, you know how that goes. So anyway, try to have a very clean area because if a speck of dirt ends up under the wallpaper adhesive, it could be noticeable, and you also don't want it to rip through.

Once you have your hardboard panel laid out, start with the first pattern from your wallpaper order. This will depend on the style, and type you decide to go with. If it's a continuous pattern, they should be numbers in order of how they go. Depending on the size you are creating, there may be a seam on the panel, or you can measure and try to order to the exact size you need so that you only need to roll it out without a seam.

We used a peel and stick wallpaper which made it a lot easier because there were a few times we had to peel it back and realign it. Once you have your wallpaper set, you can make the cuts you need for your trim. You can decide if you want to paint them before you adhere them or paint them after you have them on. We used liquid nails for the trim and also put a few weighted items on the corners so they didn't turn up. We also did this project when it was extremely hot out, so I'm sure that played a factor in it.

Once the paint and liquid nails were dried, we used white caulk to go around the outside edges to give it a more finished look and fill in any gaps between where the corners of the trim meet. We let them sit and cure for a day or so and then hung them up.

We used picture frame hangers and made sure they would hold the appropriate weight for the size we went with and added felt pads to the back four corners to help prevent scratches on our wall. After your pictures are hung, you can sit back and admire them and enjoy the transformation that takes place. 

Framed Wallpaper Panels

Fireplace Makeover

I think it's safe to say that many of you know we are always getting into some sort of renovation project around here. For the past six years it seems like we have always had one going on, one on the list, or one that we're preparing for. Aside from taking on our own full home renovation we're also flipping and renting houses on the side. 

After sharing more about my thoughts on our summer and how I really enjoyed having more time with my boys, I've been thinking a lot more about wanting to possibly do this more (maybe even a full time thing) if the right opportunities come about. I know a lot has to do with the market and things can be so up and down, so we will see where this journey takes us. For now, I'm enjoying the projects we are working on and thankful for the ones we've done.

Let's get back to the fireplace makeover for now. The one I'm sharing here is our back fireplace that's in a room that we have now designated as our office/study area. We loved that this room had a fireplace but I knew even when we came to see the house that the fireplace was going to need some updating. I know that everyone has different styles, budgets, and tastes, and I encourage that, but the green marble just wasn't doing it for me. In fact, getting rid of the marble was probably the hardest part of this fireplace renovation.

I took a sledgehammer to that bad boy and banged, and banged, away at it. Once A few areas started to chip, some of them came off in larger pieces, and I continued to bang away. There were some stubborn pieces that I had to chip away at until I was able to eventually get them all off. Let's just say I certainly used muscles that I don't always use. I was able to get Eric to give me a back rub and a foot rub out of it which is always a win in my book. Ahhh I could get a massage everyday if I could. Anyway, he offered to help me, and he did coach me along the way, but I told him I wanted to tackle this one. I also kind of felt like a powerhouse pounding away at the marble with a sledgehammer in tow. Even if I did pay for it the next day. 
We had some leftover paint from an accent wall that we used in one of the bedrooms and decided that the mantel would look good with a pop of color instead of the wood stain that was on there. We could have completely redone the mantel, and if this was our main fireplace I probably would have, but since this isn't, we wanted to keep this project on a budget and use some of the resources we already had. After seeing the mantel painted that blue color, I was not in love with it. I felt bad since it was already painted, and I contemplated just keeping it that way and hoping that it would grow on me. I tried really hard to like it, and it seemed like a good idea at first, but something wasn't doing it for me.

The more I thought about it, I realize that it's ok to change your mind. If you're working on a project, I don't think you have to settle if it's a reasonable change and you don't mind putting in the work. Remember when California Closets did our master closet and our laundry room? Well, they also did our custom desk area. Once that was installed I knew for sure the blue should go. Painting the mantel black felt like the right choice and I am really happy with how it came out. It compliments the desk area so well and really sets the tone for this room. 

We used a white ceramic tile for the surround that has a subtle design to it. I really liked the longer  rectangular shape of them and the contrast between the black mantel and the white tile. We installed it like you would with any other tile using thinset mortar, a wet saw to cut them, and then grout to finish it off. Since the area we were working with around the fireplace was pretty straight forward, we didn't have to make any odd cuts. We did caulk around the tile and fireplace insert to give it a clean edge look.

I knew I wanted the hearth to lay flush with the floor instead of it being raised up. I went to a local stone yard and explored my options. I needed something with certain measurements that would be able to be cut to the size we needed. The width wasn't an issue with cutting it, it was the depth. They cannot cut the depth down on a stone like that. Just an fyi, if you decide on wanting the hearth to have an inset look. You might have to work with the stone options they have or choice a different option. At first we thought about doing a herringbone tile hearth, but with the pattern on our area rug, it felt like things would be too busy and it didn't draw your eye the way I was hoping it would to the fireplace. After seeing the darker mantel, I knew I wanted to go darker on the floor as well.

I can't wait to decorate the mantel for the holidays and all the in between! I would love to hear what some of your favorite things are to decorate your fireplace for the fall?
fireplace-renovation
Copyright © Beautifully Candid 2017. All Rights Reserved. Powered by Blogger.